| Welcome, Guest |
You have to register before you can post on our site.
|
| Online Users |
There are currently 8 online users.
» 1 Member(s) | 7 Guest(s)
Rogereloma
|
|
|
| Weyrat |
|
Posted by: __denby - 08-19-2024, 10:50 PM - Forum: Demi-Humans
- No Replies
|
 |
Weyrats
"Flesh woven by pestilent greed."
![[Image: xn0YWzd.png]](https://i.imgur.com/xn0YWzd.png)
Inasmuch the same as the races of men and elf in their ways of life created a sort of psychical tension within the ever-forming realm of the Sangreal, the dwarves were no exception here. A race of manlike things whose hardy ethics and familial bonds carved into the bones of the realm like so many termites - singing, breaking bread and sharing mead. It was not the happiness of the dwarves, for they were often quarrelsome things, it was neither the great works and mighty fortresses that caused a certain sticky envy to ooze between the veins of the earth beneath their feet. Nay, it was the bounteous feasts and ponderous golden trinkets that hung from neck and ear - it was the great glinting gemstones and ancient casks of wine that called out to the darkness beneath their feet with every devoured morsel. It was the opulent cities and great halls of their own mountain fortresses which gave rise to a new thing beneath the mountain. Where the dwarf sought wealth for their kin and kith, this new thing sought wealth for squander; it sought food and drink for debauchery, it sought clothing for mimicry and tools for pride. That draconic spirit of envy buried deep within the realm festered and infused itself with the least of those that scuttled and scurried in the dark halls of the mountain.
It is said that the great beast in some way tainted the very foodstuffs eaten by the dwarves; it was the emotion, carried through by the act of nourishment that fell scant scraps to the meagre rats and mice which lived alongside their dwarven host. They grew, in size and mind to grow into little more than a rival, a cruel caricature of dwarfenkind. It did not affect the dwarves, and thus they did not notice until groups of man-like rats, four and five feet in height began to arise as boogeymen in the larders and supplylines of the furthest mines. As rats, they multiplied - a youngling weyrat seeming to reach a state of combat-capable maturity in less than a year. In contrast to the slow and methodical methods of the dwarves, these ravenous and furred things were far better adapted to the deep dark. Some possessed furs of deep grey and mottled black, still others ranging from browns to whites - as likely varied as their loathsome precursors. Deep in the mines and anteways of the dwarves there grew a small civilization of these weyrats over some years, and feral though they are, they are capable of communication, thought and civilization on the level of the surface races. It is evident however that their society is merely a facade, with the wealthiest being solely the strong and the greedy. In the fairer cities of the surface world there are from time to time found weyrat merchants, where in places abandoned dwarven civilizations have been co-opted by their animalistic counterpart.
Their frames wiry but strong, their paws nimble enough to unfasten clasps and sift coin from dust - it was as if the tools of this realm were made for them. At least, that is what a rat would tend to think. Where once they had chewed indiscriminately, they began to sort. Where once they had nested in chaos, they began to arrange. They did not rediscover dwarven purpose—they replaced it with something altogether different. They learned value. The first caches were crude: piles of metal objects dragged into hidden corners, glittering without reason. But over time, patterns emerged. Tools were grouped by function. Weapons were stacked, then separated by condition. Trinkets—rings, chains, carved stones—were gathered not for their utility, but for the way they drew attention. A chipped gem might be placed prominently while sturdier iron lay buried beneath, as though the Weyrats understood instinctively that perception itself could be traded.
Deep within the old merchant quarter of the dwarves, they established their first true market. The great hall, once lined with orderly stalls and governed by strict guild laws, became a maze of crooked tables and hanging wares. Tunnels collapsed by time were reopened, not for passage, but to create secret routes and hidden storage. Nothing was wasted, and nothing was truly lost—only moved, concealed, and eventually, offered. For the Weyrats did not merely hoard. They dealt. Their raids upon the surface began as opportunistic ventures—night forays into farms, caravans, and unwatched storehouses. But soon they grew bolder. They learned the habits of traders, the timing of shipments, the weak points in dwarf-guarded lifts and sealed doors. Goods vanished without trace: bolts of cloth, casks of ale, crates of tools. Even coin itself, stamped with the marks of distant realms, found its way below.
And then, in a twist that baffled those above, some of those same goods began to reappear. Travelers who wandered too near certain fissures or forgotten mine entrances reported strange encounters: cloaked figures with twitching whiskers and bright, appraising eyes, offering wares in exchange for other goods. Their speech was halting but deliberate, laced with a peculiar sense of calculation. They haggled not with anger, but with a kind of playful cunning, inflating value where it suited them, dismissing worth where it did not. A farmer might lose a crate of tools in the night, only to find a Weyrat merchant weeks later offering those very tools—alongside others—for twice their worth, or in exchange for something entirely different. A dwarf might guard a shipment through treacherous tunnels, only to discover that the rarest items had vanished and were now being bartered deep below, traded back in altered forms or bundled with curiosities of dubious origin. The Weyrats thrived on this circulation. To them, ownership was fluid. Possession was temporary. What mattered was movement—of goods, of opportunity, of advantage.
Within their subterranean domain, a hierarchy emerged, though not one of kings or councils. The most successful traders, those who controlled the largest caches and the most intricate networks of tunnels, held sway. Alliances formed and dissolved with the exchange of goods. Debts were tracked with obsessive care, recorded in scratches along stone walls or in bundles of knotted cords. To owe was to be bound; to collect was to rise. Yet for all their cunning, the Weyrats remained creatures of instinct as much as intellect. Their markets were noisy, chaotic places, filled with chittering voices and the constant clatter of shifting wares. Disputes were settled quickly, often with tooth and claw, but rarely to the death. A dead trader could not repay a debt. The dwarves, when they returned to reclaim portions of their lost halls, found not emptiness but occupation. Their sealed vaults had been breached, their careful inventories scattered and reinterpreted. Attempts to drive the Weyrats out met with limited success. The creatures did not defend territory in the conventional sense—they abandoned sections under pressure, only to reappear elsewhere, their goods already relocated.
Some dwarves, pragmatic and weary of endless skirmishes, chose a different path. They traded. It was an uneasy arrangement. Deals struck in the dim light of reclaimed halls, with Weyrat merchants perched atop crates of stolen goods, offering items that had once belonged to the dwarves themselves. The terms were rarely fair, but they were effective. What could not be recovered by force might be regained through exchange—at a cost. In time, the underways became something neither dwarven nor wholly alien: a layered economy of loss and acquisition, where goods flowed in loops and ownership blurred into transaction. The Weyrats did not restore the mines, nor did they destroy them. They repurposed them into something restless and ever-shifting.
|

|
|
| Kobolds |
|
Posted by: __denby - 08-19-2024, 10:49 PM - Forum: Demi-Humans
- No Replies
|
|
Kobolds
"Flesh woven by irreverent chaos."
![[Image: o7Ecywh.png]](https://i.imgur.com/o7Ecywh.png)
In the manner of order and orrery, Elven-kind in their woodland citadels planned all by the motion of the spheres. Feast and festival divided by the unflinching space of time, love and conflict interspersed among what is deemed proper by the heavens. It was this restriction of the exuberance of the divine spark by mortal notions that began in a way to curdle, seeping beneath the surface an unconscious recoil amongst the nether-mind of the Sangreal. It was the plan of Narrative to create these various living creatures with 'plans' and 'goals' and 'strategy', and that plan having been witnessed by that one of darkness infuriated it. From the cold mind of the abyss was wrought then a vision, of pillaging and feasting - of razing and drink - of violence and spontaneity. In the manner of thrashing, barking, yowling pack-beasts of the forests there was the essence of hot-blooded chaos elevated to mind. Flashes of crimson, of impulse, of taking and tearing for the sake of it given form. This hateful child of old brought forth his progeny of filth through the twisting of pre-existing fauna. Like taken by a sickness, the wolves, the coyotes, the foxes and the strays ejected by villages of men lay themselves in secret rooted burrows. Wait to die they did, and did not; bones snapping, body tearing, a new thing arose from that burrow possessed of a newly modeled mind bent upon fury and revelry.
It was this twisted curse appointed to the blameless creatures of the woodland that brought about a variety of color and form in their kind. Typically ranging in height from four feet to six and a half feet, the Kobold possesses a body of fur in the manner of the beast they were. Having the upright form of digitigrade-bipeds, the forelimbs possess hands in the manner of elves and men, equally with minds capable of understanding and using the tools of such races. The hindquarters and legs of a Kobold tend to possess the paws and tails of their beastly progenitors - and their manner of men is only shared in the design of the shoulder and way the head is carried. Heads, mouths, and general behaviors tend to stem in some degree from the animal forebear, including eating and digestion habits. While the Kobold may possess the ability to be integrated into the society at-large, they have a propensity for crime and destructive behaviors by their very nature. In the years after the dawn of life within the Sangreal, elf has been at war with kobold with much evidence to the latter's treachery and destruction.
In the elder days, before the roads broke and the sky seemed closer to the earth, there stood the city of Lethrien—an immaculate work of high elven design, rising in pale tiers along a river that curved like a deliberate brushstroke through the land. Every arch and avenue followed a principle. Every garden was measured, every tree pruned into intention. The elves of Lethrien believed that order was not merely preference, but virtue made visible. Their laws were few but absolute. Their calendars were mapped centuries in advance. Even their songs adhered to ancient structures, passed unaltered from one generation to the next. To deviate was to unravel; to unravel was to fall. Beyond the city’s boundaries stretched a forest long regarded as a stable constant—wild, but predictable. Its edges were patrolled, its deeper regions cataloged. Creatures lived there, certainly, but none that threatened the balance of Lethrien’s existence. Or so the elves believed.
The first signs were dismissed. Hunters reported strange tracks: not wolf, not man, but something that shifted between. Groves at the forest’s edge were found shredded—not consumed, not harvested, but destroyed. Trees torn apart without purpose. Birds fled the canopy in unnatural silence. The Council of Measures recorded these incidents, debated them, and assigned observers. Patterns were sought, hypotheses drafted. Nothing in their long history had prepared them for a force without pattern.
Then came the howling.
It began at dusk, a sound like laughter dragged across broken glass. The forest itself seemed to recoil from it. That night, the outer watchposts fell. By morning, the first refugees staggered into Lethrien’s lower districts—wounded, incoherent, speaking of creatures that walked upright yet moved like beasts, their limbs too long, their jaws too eager. They were called, in the records that followed, the kobold. But no term fully contained them. They did not invade as an army would. They spilled. They erupted from the forest in erratic surges, striking not for gain, nor territory, but for the act of ruin itself. Fields were trampled, not harvested. Wells were fouled. Homes were torn open and left in splinters, as though the act of breaking brought them satisfaction. When met with resistance, their violence sharpened. They did not merely kill—they lingered. They returned to the same places to undo what had been rebuilt, as if driven by a need to deny restoration itself. The elves responded as they always had: with structure. Defensive grids were established. Rotations of archers and mages were assigned precise intervals. Barriers were raised according to geometric principles designed to maximize coverage.
It did not matter.
The dog-men did not respect lines. They did not respond to deterrence. They learned nothing, yet adapted in ways that defied understanding. A wall would hold one night and be bypassed the next, not through strategy, but through sheer, chaotic persistence. Worse still, the forest advanced. Trees at the edge of Lethrien began to grow unchecked, roots cracking stone, branches reaching into avenues once kept pristine. It was as if the wood itself had abandoned its quiet agreement with the city, surging forward to accompany its feral inhabitants. Within the Council, dissent—once unthinkable—took root. Some argued for greater force, others for retreat to inner districts. But every decision required deliberation, every action adherence to established process. Time, once their greatest ally, became their enemy. The breaking point came not with a grand siege, but with a simple failure. A scheduled rotation of defenders did not occur. Messengers sent to correct the lapse were found torn apart. In the absence of that single, precise movement, a section of the city lay exposed—and the kobolds poured through. What followed was not a battle, but an unmaking. Order collapsed under the weight of unpredictability. Streets designed for symmetry became channels of panic. The songs ceased. The laws, though unchanged, became impossible to uphold. For the first time in their history, the elves of Lethrien faced a force that could not be reasoned with, predicted, or integrated into their system. And so, they did the unthinkable. They fled.
Under cover of what defenses remained, the surviving population gathered what they could—records, relics, fragments of their carefully maintained past—and fled southward, abandoning the city that had defined them. Lethrien did not fall in fire, nor was it conquered in the traditional sense. It was rendered incompatible with the nature of its inhabitants. In the years that followed, travelers spoke of a pale ruin swallowed by wild growth, where broken spires rose among tangled branches, and where, at dusk, the howling still echoed through the hollowed streets. Of the elves, it is said they never rebuilt as they once had. Their new settlements were looser, less certain. Their songs changed. Some say they learned resilience. Others say they lost something irretrievable—the belief that the world could be made to hold still. And in quiet moments, when the wind shifts just so, they remember the sound of something that could not be ordered, and the city that could not survive it.
|
|
|
|
| Goblins |
|
Posted by: __denby - 08-19-2024, 10:49 PM - Forum: Demi-Humans
- No Replies
|
|
Goblins
"Flesh woven by vile wrath."
![[Image: jTaHvkI.png]](https://i.imgur.com/jTaHvkI.png)
Narrative's laughter, joy, love, her feelings of creation trickled down through the rocks and the silt. It filtered, dripped and percolated deep into the cold and dark places of the realm, untouched by light and teetering ever-so-gently upon the lapping surface of the Abyss. It angered that ancient writhing mind, and the beast hated such that the hands of Narrative had built. It despised the humans for their places of wealth and learning, it hated the elves for their great and lofty philosophy and their decadent industries. It was this hate, that formed into a thought - a thought in a mind so ancient that the concept could be before it was, wrath. It would not be that the men and the elves could stand in their grand cities and opulent fortresses - the beast envisioned war, flames licking and banners jostling. Hate, felt as though filled in the mouth with metal and fury - roaring. The thought grew teeth and gut and voracity; the thought grew ears, eyes, and a mind that craved that which it did not have. From the slime and the muck of the low places of the world, there arose a physical form with which it was embodied.
It was symbolic, in a way, that the most wretched swamps and mired valleys would produce a form of life in antipode to the high things of men and elves. From the muck arose creatures, similar in stature to man, ranging in height from four to six feet. Equally varied in mass and shape, there were those with sharp minds and round bellies, equally those with but a stone between their heads and bodies of wrought iron. Skin as tough as the hide of an ox and with muscles that drew more from the beasts of the realm than that of men, the forms of these creatures seemed truly an antithesis. Facially, they possessed features that were an admixture of man, of hog, and of frog - the alliteration potentially important to the mind of the demiurge. Animal affects such as horns and nodules appeared, mostly depending upon the faculty and the locational origin of the specific tribe. these goblins bear a strong resemblance to frogs magnified and twisted by malign purpose. Their hind legs are powerful, capable of carrying them in great, sudden bounds, while their hands—webbed but tipped with sharp, grasping claws—serve equally well in water and on land. Their skin glistens with a constant sheen of moisture, mottled in greens and blacks that render them nearly invisible among reeds and rot. They do not seem to breed as other creatures do, nor have any found nests, eggs, or young. Each sighting describes them as fully grown, as if the swamp itself disgorges them when conditions are met.
Aggression in them is not situational, but constant, a simmering state that seeks outlet. They hunt, certainly, and will devour fish, fowl, and flesh alike, but feeding does not appear to lessen their hostility. Indeed, there are recorded instances of them turning upon one another in brief, savage clashes that end as abruptly as they begin, with no lasting feuds or signs of rank established. Of particular note is their reaction to the works of men and mer. Structures, fences, and—most especially—fire kept under control seem to draw their attention. Some speculate that the scent of smoke carries far across the wetlands, acting as a lure. Others argue that it is the very notion of order imposed upon the wild that provokes them, though such thinking strays from natural philosophy into the realm of metaphor. The destruction of a small riverside settlement some decades past offers the clearest account of their behavior beyond the swamp.
As recorded by a lone survivor, the creatures emerged at dusk in unnerving silence, only to erupt into a cacophony as they breached the outer palisade. They moved with alarming coordination, overturning carts, scaling walls, and seizing torches from their victims. Fire spread quickly thereafter, leaping from thatch to timber as if eager to assist its new masters. Yet the goblins did not behave as raiders seeking plunder. They took no goods, claimed no ground, and made no effort to pursue those who fled beyond immediate reach. Instead, they remained amid the growing blaze, darting through smoke and flame with seeming indifference to heat or injury. When the settlement had been reduced to smoldering ruin, they withdrew as suddenly as they had come, vanishing back into the marsh without a trace.
Some goblins appear to have integrated with the societies of Sangreal at large - these occasionally being outcasts from their tribes, though some see them more as intelligence-gatherers for future raids. It is still too early to determine the end-goal of every Goblin, but it is know their origin is with the dark, and not the powers of the light.
|
|
|
|
| Halflings |
|
Posted by: __denby - 08-19-2024, 10:48 PM - Forum: Humanoids
- No Replies
|
|
Halflings
“Vessels of mortal flesh, bound by the aspect of Belonging.”
![[Image: AD_4nXfMyn8_3K7gRPKMDfoQmBu_-Y-gGjF-cuY-...v5Wtznhabg]](https://lh7-rt.googleusercontent.com/docsz/AD_4nXfMyn8_3K7gRPKMDfoQmBu_-Y-gGjF-cuY-nz2l2zIX21JKtQvaM04S7MY0vgFShVGnH72yk-UP49Ndvab7KIDcARPJo_bqsZuv1q7d0gxGnL9wuJkP9VuqNYjmTwkyq5cOyjOXqQ?key=TkSBtgn38ew_v5Wtznhabg)
It came to pass that many cycles after Narrative had produced the first clans of dwarf, the world still did not ring with a positive note. In fact, where the dwarves had been possessed of the intent to be diligent, they too possessed in spades the concept of greed, wealth, and the division of society according to those concerns. While on the surface the world was better, more diverse and filled to the brim with new concepts and materials, it too brimmed with death. War machines crafted by the insatiable hands of dwarves drove legions of men to their afterlives and ruined elven cities whose foundations had been laid at the beginnings of their age. Subdividing the aspect of Intent that had been so carefully preserved with the creation of the dwarves would cause unknown consequences for her burgeoning- albeit misled race. So, a new aspect of the Godhead would be required to emanate a new force into the creation; one unused, separate from the descension of the tree of life was Desire- and so it was chosen, like a golden berry in the seething void. Narrative then focused on a new creation, drawing within the Aspect and upon the feeling of Belonging. To the dwarf, there was the clan and there was profit, but to the halfling there would be only kin and mutual prosperity. After all, it was the clamor of children and the clinking of dishes that Narrative herself had come to so greatly enjoy in the play that acted out before the Godhead. Forming them from the straw of the field, mead of the valley and the earth of the Westcontre’s highlands, Narrative emanated the fourth race of the Grail by the aspect of Desire.
Standing no more than four feet and eight inches, it is somewhat a misnomer that the halfling is ‘half’ the height of the human. Short in stature and rather thin in build, the race of halfling is not strong nor is it quick, instead having features that are almost neotenous compared to the other species of the Grail. There is equally little in the way of sexual dimorphism amongst the halfling species, their lives being long and the societies from which they descend being incredibly communal. Hair colors typically range from shades of blonde to dark brown, usually turning white or gray with extreme age. The oldest of halflings, while infirm and poorly sighted, have been known to reach almost three hundred years. Skin tones range from earthy blacks to pale linen and typically are determined by the environment that each group has called home.
The first halflings drew breath within the territory of Abessia, deep within the highland forests where little interaction from the other races would be had. It was in this way that the newly formed creatures under Narrative’s watchful eye adopted a form of communal matriarchy. It was the mother that birthed them, it was the mother that fed them, and it was the mother that should rule over them. Typically the oldest and assumedly most ‘enlightened’ female of the clan was appointed as matriarch, and in this way the halflings preserved great wisdom within their culture. More important to them were the cycles of nature, the joys of great meals and succulent dishes brought about by their mastery of animal husbandry- and most of all the harmonious community that seemed to simply spring into existence around them. Theirs was a peaceful life until their first interaction with the race of men.
For nearly four centuries, the halfling village of Mossvale rested like a moss-covered gem in the emerald cradle of the Verdant Vale. Beneath arching canopies of alder and rowan, generations tilled the fertile soil, lived by the rhythm of sun and seed, and honored the wisdom of their singular sovereign: Grandmother Thistleburr. Elected once in a lifetime by consensus and custom, the Grandmother was no queen, but a living archive of the halflings’ gentle, matriarchal lore—a weaver of peace, a keeper of seasons, a judge with flour on her sleeves. Mossvale had no need of gates. No wars had touched its soil. Strife was a stranger, and ambition was considered a weed—useful in tincture, poisonous in overgrowth. Then came the Abessy.
They descended from the passes of the Sapphire Mountains like an answer to a riddle never asked. Tall, sun-burnished, eyes like volcanic glass, the Abessy brought more than goods: they brought spectacle. They danced before they spoke, bartered with riddles, and moved through Mossvale with the easy confidence of fire through dry leaves. Their culture gleamed with a dangerous magnetism—imperial in bearing, seductive in sound. They called Mossvale a “sleeping jewel.” They called Grandmother Thistleburr “the Crone Regent,” half in jest, half in charm. And Mossvale, in its naivety, laughed with them. The Abessy brought artifacts from their eastern coasts—iron-studded drums, fermented wines that sang through the blood, narcotic herbs that turned dreams into visions. At their fires, stories of gods with spears and queens with crocodile mouths replaced the old tales of mole spirits and orchard sprites. Their language, rhythmic and proud, slid like honey into halfling ears. The youth listened hardest.
It began with the harvest rites. Where once halfling girls danced slow circles in linen and garlands, now they painted themselves in ochre and moved in fierce spirals, mimicking the Abessy rites of passage. The boys, formerly apprenticed to rootwork or oven-craft, were taught how to chant in cadence with footfalls and strikes. Fallow fields became arenas. Clay stoves stood cold as feasts turned to revelries of spectacle and flesh. Thistleburr watched in silence from her hill-cottage as the very roots of her people’s identity withered beneath the heat of the Abessy sun. She spoke, eventually. In the Meeting Hollow, she addressed all. “We are not broken, to require remaking,” she said. “A vine does not envy the tree simply because it grows tall and loud.” But her words, once enough to halt feuds and guide generations, were now met with sideways glances. The Abessy priestess Matara-Kem, newly settled in the village’s old herb hall, responded with her own parable—of rivers that stagnate if not stirred, of people who die when they do not evolve. Within a year, the Grandmother’s authority was ceremonial. By the second, openly mocked. Then came the Ember Solstice. Under banners of gold and black, Matara-Kem declared a New Compact: a hybrid culture, ruled not by one grandmother but by a triumvirate chosen through “strength, vision, and divine favor.” Thistleburr, refusing to endorse it, was escorted from her home by youths who once brought her spring flowers. Her cottage was burned, her name struck from communal record. It was said she wept, not for herself, but for the taste of smoke in the orchard air.
In time, Mossvale was transformed. Spears replaced shepherd’s crooks. Songlines became war chants. Modesty turned theatrical, hospitality became transactional. The matriarchal rhythm, once slow and steady as a river’s current, had been drowned beneath a thunderous tide. The Abessy called it Renaissance. In exile, Grandmother Thistleburr named it the Withering. Years passed. In the shadows of Bramblefen, where briars grew thick as curses and even the Abessy dared not tread, Grandmother Thistleburr endured. She lived among roots and ruin, gathering strays: halfling children who had fled the New Compact, elders who would not kneel, even a handful of Abessy dissenters who found Matara-Kem’s zeal too absolute. She taught them not only how to harvest mushrooms and whisper to bees—but how to kill. She had once been the bread-keeper of her people. Now she learned the arts of breaking. From scavenged wreckage and stolen scrolls, Thistleburr fashioned a doctrine of war. She twisted Abessy tactics—scorched field maneuvers, shadow raids, ritualized deception—into something colder, more precise. The first raids were whispers on the wind: a granary burned to the ground, an armory emptied, a priestess found poisoned with wolfsbane. The triumvirate dismissed them as outlaws. But when a newly raised idol of the war-god Hamarek was felled and buried in a dung heap, the people began to murmur.
When her fighters struck at the Summer Vigil—masks donned, drums drowned by screaming—Mossvale finally understood. Thistleburr had returned. The village erupted in confusion. For many halflings, Thistleburr was still a memory of warmth and sense, a ghost of balance. Yet her return was no soft spring. It was winter with a blade. Matara-Kem, shrewd and unyielding, ordered a purge of any who spoke Thistleburr’s name with reverence. Dozens vanished into the Rootcellar Prisons. In response, Thistleburr sent back their guards in pieces—ritualistically arranged, a mimicry of the Abessy funeral glyphs. Still, the turning point came not with blood, but with fire. The Fields of Loam, Mossvale’s sacred grain terraces, were razed under moonlight by Thistleburr’s own hand. She stood on a ridge and watched the harvest burn—flames dancing like mad children across centuries of memory. Her apprentice, a quiet lad named Brindlecap, wept beside her.
“Why, Grandmother?” he asked, voice small beneath the crackle.
“Because if they eat, they endure,” she said, eyes dry. “And if they endure, they forget what we were.”
It was the moment she crossed a boundary no halfling ever had: the deliberate starvation of her own blood. The siege began that winter. Mossvale, girded in Abessy stone and pride, buckled not to force but to hunger. One by one, homes were abandoned, faiths fractured. Matara-Kem held her temple until the roof collapsed under fire set by infiltrators who sang lullabies as they torched the beams. Thistleburr walked into the ruins not as a liberator, but as a shadow. She claimed no title. She restored no council. The triumvirate lay dead, the shrines shattered, the drum circles silent. But what was left was not Mossvale. The orchard groves were stumps. The children had learned to stab before they learned to bake. Even Brindlecap, her most loyal, no longer smiled. The halflings won their village back. But they had paid with their soul. It is said rain fell from the sky slick with salt on the spring equinox that year, the tears of Narrative once again wetting the world that the unseen hand of darkness had taken too the goodness of her race and bent it into something foul. The children of the new Mossvale no longer sang. They trained.
From the age of five, they learned to track without sound, to slit throats in the dark, to cook roots into poison or poultice. War had become not an exception, but inheritance. The trees had grown back crooked. The village was a fortress of alder and stone, its walls carved with the grim faces of saints who had bled. Festivals were few. Bread was bitter, and stories shorter. And yet, among the crumbling shrines and smoke-darkened hearths, the old name lingered: Thistleburr. To most, she was myth. The Pale Grandmother. The Witch-General. A name muttered when someone vanished in the woods or when fire appeared where none had been lit. Her teachings were canon and curse alike. In the Hall of War-Records, a single threadbare banner bore her sigil: a branch split at both ends, blooming and burning at once. But one young girl wanted more than fragments. Ivyroot, born of the warrior caste but possessed of a scholar’s hunger. She found the last living witness in the outer glade—a centenarian beekeeper known only as Old Brindlecap. His hands trembled, but his memory did not.
“She was kind, once,” he told Ivyroot, “before she turned her kindness into a weapon.” Over weeks, Ivyroot listened. She learned of the moss-woven festivals, the long loaves passed down in peace, the orchard rites, the dance of grandmother’s bells. She learned that Mossvale had not always been a training ground. That there had been songs without screaming. “But she saved us,” Ivyroot said once, hesitant. “Didn’t she?” Brindlecap exhaled, a sound halfway between a sigh and a laugh. “She saved the body, child. But lost the heart. What we reclaimed—was it Mossvale? Or just the name?” Haunted, Ivyroot began her true work. In secret, she compiled the forbidden: lullabies, hearth-legends, even fragments of Abessy poems once outlawed. She mapped the lost groves by moonlight, sketching trees that no longer stood. Her writings, bound in bark and sealed in beeswax, would become known as The Memory Codex.
It was Ivyroot who first dared to say what no warrior would: “We must choose which part of our past we carry, and which we bury with the dead.”
In time, her teachings spread. Slowly. Painfully. A new generation learned to bake as well as bleed. To mourn without vengeance. They carved spoons as well as swords. Not all agreed. Not all forgave. But a balance began to emerge—not the old matriarchy of peace, nor the burning theocracy of the Abessy, but something liminal. Something earned. Halfling society has been marked by a great distrust for the other races since, seeing no good coming from anything beyond the walls of their own village now.
|
|
|
|
| Dwarves |
|
Posted by: __denby - 08-19-2024, 10:48 PM - Forum: Humanoids
- No Replies
|
|
Dwarves
“Vessels of mortal flesh, bound by the aspect of Diligence.”
.
![[Image: AD_4nXfqYJNaA_4r1jYgIZ9AT2QQdbXULaSa9r9y...v5Wtznhabg]](https://lh7-rt.googleusercontent.com/docsz/AD_4nXfqYJNaA_4r1jYgIZ9AT2QQdbXULaSa9r9yl0ZFni_iQkiA_HdvllDtvRd6LfHNYgN8NMqDJ4IQPm3dkigYNacByHZ4Kntekn1Ny5nmWxnU6qD9rI5hvpAs2I3FPUlgn9E_re3z?key=TkSBtgn38ew_v5Wtznhabg)
War burned as flames upon the great tapestry of life that the divine play came to endear. Want and envy drove the great houses of the Elves to one another’s throats, while the races of men like a pestilence, found heart in slaughter, theft and plunder of their warring greaters’ fief. From the cauldron of emotion that dwelt within but a few lords, there could arise suffering and pain on an immense level. In their fractious state, the Godhead had only just began to realize that so much more than a stage of enjoyment and mirth had been set. How many generations had passed since the first life crawled forth from oily sea under blackened sky? Life and Death were but cycles, feeding the eternal flame of creation’s engine - such was the design, but something else corroded the gears and ate away at the foundation. Illumination could feel it. Life lived, life felt, and it felt suffering. Thus in an effort to right the keel of Sangreal, Narrative was inspired with but an emanation of Intent, descended from the Will and Order of the godhead. Needs existed within the forces of the world that, in their lack of fulfillment, caused undue suffering. Men and Elves, craftsmen that they were, simply had aims elsewhere. Thus, springing forth from the riverclay of the Westcontre and taking shape by the aspect of Diligence, the third race of the Grail was born - the Dwarf.
Dwarves are rather short, none exceeding four feet and eight inches- though their true nature is not simply defined by their height. Despite being of such short stature, they possess abnormally dense bone and muscle, resulting in their weight and strength being similar to that of the standard human. Dwarves are small, yet strong, but they do not possess the agility and speed of humans due to their size and rather awkward bulk. Facial features of Dwarves are usually heavy, large noses, heavy brows, and thick cheekbones are common features of the average Dwarf, as well as a well-protruding chin. Stocky necks and broad shoulders are equally common, and all attributed to their physical nature. Dwarves have a wide variety of skin-tone, though it is spread usually from pale to Chocolate-Brown, Ebony-Black, and anything in-between. In terms of hair color, Dwarves are fairly generic in this regard- ranging from a very Dark Dirty-Blonde, to a Dark Brown or Black, and anything in-between. In great age, Dwarves may gain the classic Grey to White-haired appearance that goes with age.
Nestled in the rugged embrace of Ossus, where the River Caelwe weaves through the spine’s deep valleys, dwarves set about forming their first real city-state. A society of industrious artisans, shrewd merchants, and fiercely loyal clans, the Dwarves of Ossus built a reputation as masterful stewards of wealth. Their culture, steeped in the pursuit of familial prosperity, thrives on the intricate dance of trade, crafting, and clever negotiation. The Ossan Dwarves trace their origins to the First Clans, who delved into the valley's rich veins of silver, gold, and gemstones. Over centuries, they transformed their mountain halls into bustling centers of commerce, with marketplaces carved into the rock and vaults brimming with treasure. The heart of Ossan society is the city of Kragsthal, a sprawling subterranean metropolis where the clink of coin echoes alongside the hammer’s ring. At the core of their culture is the concept of Keldorin, the sacred duty to amass and safeguard familial wealth. To the Ossan Dwarves, the prosperity of the family is paramount, and each clan operates like a small trading house. This drive has made them canny merchants, adept at extracting wealth from humans, elves, and other peoples who come to trade in Ossus or encounter their caravans in distant lands.
The Dwarves’ mastery lies in the balance of supply and demand. They are artisans of the highest caliber, crafting fine jewelry, enchanted weapons, and tools of unrivaled durability. These goods, highly sought after by human lords and elven nobles, are sold at exorbitant prices. But the Dwarves are equally adept at importing goods from distant regions—silks, spices, exotic woods—and reselling them to their neighbors at a profit. This web of trade allows them to act as intermediaries, extracting wealth from all sides while revealing little of their own sources. To further their economic dominance, the Ossan Dwarves are not above subtle manipulation. They finance wars between human kingdoms, ensuring demand for their arms and armor while extracting repayments in land, gold, or trade privileges. Elves, though more resistant to Ossan bargains, have been lured into disadvantageous trade pacts through the Dwarves’ careful flattery and unyielding patience. Governance in Ossus reflects their mercantile nature. The Council of Coin, composed of the heads of the wealthiest clans, rules collectively, each decision weighed against its potential profit. Disputes are settled in the Hall of Scales, a grand chamber where arguments are measured as carefully as gold. Though fiercely competitive, the clans are united against outside threats, for they understand that a secure Ossus benefits all.
Despite their mercantile cunning, the Ossan Dwarves maintain a strong sense of kinship and tradition. Festivals celebrating clan achievements, the unveiling of masterworks, and the recounting of trade conquests are central to their lives. They honor Thuldin, the Forgekeeper, as their chief deity, offering prayers for ingenuity and prosperity. Through their blend of artistry, economic acumen, and sly maneuvering, the Dwarves of Ossus have become a dominant force in the region, transforming their river-valley into a hub of wealth and influence. In every deal, every finely crafted coin, and every traded treasure, the Ossan Dwarves weave their legacy of mercantile mastery.
|
|
|
|
| Elvenkind |
|
Posted by: __denby - 08-19-2024, 10:48 PM - Forum: Humanoids
- No Replies
|
|
Elvenkind
"Vessels of mortal flesh, bound by the aspect of Order."
.
In the telling of the dream that Illumination lived in its early lives as man, there came the search for a mentor, the search for an adversary. In order to view the reflection of man, there must have been another with which it may be reflected. Contrary to the very beliefs of the elf, it was mankind that came first yet elvenkind that was perfected. For in the beauty of man’s vulgarity, there emanated a force to fill the gap; the aspect of Order. Thus the will of the divine was made manifest by the generation of three races, governed by the unseen structures of the world that formed them.
Of that which lay within the hearts of men, being the heart of God, there were three constants in this burgeoning world out of whom sprang the three races of Elf. The wheel of the stellar sky spins eternal and nothing is as sure as sunrise and sunset. The breath of nature inhales the winter, exhales the spring, and nothing is as sure as seasons. The cloy of fear strikes in the darkness and the heart quakes before the witty tiger, nothing is as sure as predation.
Solar Elves
Governed by the aspect of stellar order, it is the purity of the cycles of that heavenly nature which stands in the heart of all Solar Elves. Pale of skin and light of hair, these elves are often of great refinement and high intellect. Living in the lowland coasts of the Westcontre, great city-state societies have been formed around these aristocratic and usually honor-bound oligarchs. Typically standing five and a half to six and a half feet, these elves are physically weaker and lighter than humans. Their cities, carved into the cliffs of Westcontre, rise like monuments to the sky. Towers of polished stone gleam in the sunlight, their walls etched with constellations and celestial maps. The greatest of these is Solyndar, the capital of their people, where the Council of Oracles interprets the movements of the heavens and codifies them into laws that govern every aspect of Solar Elf life. The Oracles, chosen for their wisdom and clarity of vision, are not rulers in the mortal sense but stewards of the harmony between the heavens and the earth.
The Solar Elves are master navigators, both of the seas and the stars. Their golden ships, slender and swift, traverse the waters of Westcontre, carrying goods, lore, and their teachings to distant lands. Their fascination with heavenly cycles has made them astrologers of great renown, sought by kings and scholars alike for their ability to predict events by the alignment of stars and planets.
Yet, their devotion to law and order has not been without consequence. The rigidity of their codes, unyielding as the orbits of the stars they revere, has sometimes led to strife among themselves and with others. Neighboring peoples often see the Solar Elves as haughty and inflexible, and their insistence on order has, at times, bred resentment.
Despite this, the Solar Elves endure as a people of profound purpose and vision. They view their lives as part of a greater cycle, one that transcends the fleeting concerns of mortal existence. In Westcontre, as the tides rise and fall beneath the eternal gaze of the stars, the Solar Elves continue their vigil, guardians of law and harmony, forever seeking to align their world with the celestial design.
Forest Elves
Governed by the aspect of natural order, it is the regularity and carnality of the earthly cycles which stand within the heart of all Forest Elves. Usually tan or dark of skin and tawny or brown of hair, these elves are often of physical prowess and great wisdom. Living in the deep interior forests of the Westcontre, small warrior tribes were oft the mode of forest elf culture. Typically standing five to six feet, these elves are on par with humans in terms of physical strength and weight.
Within the verdant heart of Westcontre lies an ancient and boundless woodland, where light filters through the dense canopy in shifting hues of green and gold. It is here, among the whispering trees and murmuring brooks, that the Forest Elves make their home. Known to themselves as the Yrdn, they are a reclusive yet harmonious people, whose lives are devoted to the stewardship of the natural world and the reverence of its spirits.
Their villages are marvels of subtlety and ingenuity, built high among the treetops and seamlessly integrated into the forest. Bridges of woven vines connect their dwellings, and their halls are carved from living wood, shaped through magic and care rather than tools. This harmony extends to their way of life, as they take from the forest only what is needed and give back through rituals of renewal.
The Yrdn are led not by kings or councils but by the Druids, spiritual guides who commune with the spirits of the land. The Druids interpret the will of the forest, passing down wisdom and guidance that has been honed through millennia. Their laws are unwritten but deeply ingrained, passed from generation to generation in songs and stories. Above all, the Yrdn hold sacred the balance between life and death, growth and decay, viewing themselves as guardians of this eternal cycle.
Though the Forest Elves are largely insular, their wisdom and the rare beauty of their craft occasionally draw outsiders to their borders. These visitors are treated with cautious hospitality, but those who seek to exploit the forest or its spirits find no mercy. The Yrdn are skilled in both diplomacy and warfare, wielding bows of enchanted wood and magic that draws upon the strength of the forest itself.
Through countless generations, the Forest Elves have remained steadfast in their purpose. Even as the world beyond their woods grows louder and more chaotic, they continue their quiet guardianship, their lives intertwined with the pulse of the ancient forest. To the Yrdn, the trees are not merely witnesses to their history—they are their history, their kin, and their sacred charge.
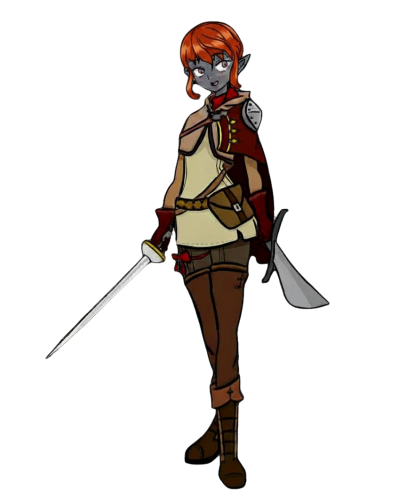
Deep Elves
Governed by the aspect of predatory order, it is the surety of natural cruelty and predation which stands within the heart of all Deep Elves. Usually gray or coal of skin and monochrome of hair, these elves possess fierce individuality and craftiness. Their society exists solely by nature of competitive cooperation - not so unlike a pack of wild dogs or opportunistic tribe of apes yet with much fiercer intellect. Living in the high mountains of the Westcontre, isolated bandit kingdoms usually formed around societies of Deep Elf. Standing typically four to five and a half feet, these elves are slightly weaker than humans but on par in bone density.
In the shadowed peaks and labyrinthine caverns of Westcontre’s high mountains dwell the Deep Elves, a cunning and resourceful people who have made their home in the earth’s bones. Known among themselves as the Morvanni, they are a society shaped by the harsh isolation of their environment and driven by a dual obsession with industry and cunning survival.
Over time, the Morvanni’s mastery of industry became their defining trait. They built sprawling underground cities, illuminated by glowing crystals and heated by volcanic vents. Great forges roared in the depths, where metals were melted and shaped into weapons, armor, and intricate mechanical devices. The Morvanni were architects of ingenuity, blending alchemy and engineering to create wonders that awed even their surface-dwelling kin.
This duality—craftsmen of unparalleled skill and opportunistic raiders—has long defined the Deep Elves’ relationship with the world. While they maintain trade with other peoples, selling their wares in exchange for goods they cannot produce, their reputation as bandits often undermines alliances. Among themselves, they view these contradictions as necessary parts of existence, bound by a ruthless code of pragmatism and loyalty to their kin.
Morvanni society is governed by a hierarchy of guilds, each devoted to a particular craft or endeavor. The Guild of Artifice, the Guild of Blades, and the Shadowed Guild of the Path—dedicated to banditry—are the most prominent.
|
|
|
|
| Humankind |
|
Posted by: __denby - 08-19-2024, 10:47 PM - Forum: Humanoids
- No Replies
|
|
Humankind
“Vessels of mortal flesh bound by the aspect of Will.”
All good stories require actors to fill the myriad roles. Each and every role written with a specific heart in mind. Thus the will of the divine to expand narrative drove the emanation of humankind, first among races and broadest of strokes. The race of men bear among them an example of every extreme, from those that could pass for a halfling to bears with a smiling face and nigh every pigment to boot. Among the ranks of humankind there exist four distinct races, the myths of each tied dearly to their geographies. Those geographies are oft the passion of men, as to the human it is the heart that proves right or wrong, truth, and purpose.
The Norden
Norden are a race of humans whose origins are scattered amongst the Westcontre’s northern realm of Norda. Tradition relates of nomadic hunting bands and woodland baronies, civilizations of seaborne raiders and mystical traditions of bygone eras whence men were nearer to their long lost forests of old. Where the divine sought stories of survival in the bleary forests and frigid night, there came the Norden.
Norden range in height from five to six and a half feet on average. Their skin is typically pale to lighter shades of tan or beige, usually reddening in the sun. Facial hair is common among men, with both men and women having coarse or wavy blonde to brown and occasionally red hair. Natural selection has led to their trending a harder build, men and women having somewhat denser musculature and heavier bones.
The Norden tribes emerged in the bleak northern reaches of Norda, a region defined by jagged fjords, unyielding glaciers, and forests clinging to life beneath perpetual frost. Their ancestors, exiles and wanderers from southern clans, sought refuge in this inhospitable land, fleeing subjugation and war. They named themselves the Norden, after the icy winds that howled ceaselessly through their new homeland, and pledged to carve a life where others dared not tread. The earliest Norden lived as hunters, fishers, and foragers, subsisting on the meager bounty of the land and sea. Over time, they adapted to the harsh environment, creating tools of bone and stone, taming hardy animals, and mastering the treacherous waters with longships hewn from frost-touched pine. Their survival depended on cooperation and resilience, and their laws were built around communal responsibility. To the Norden, no crime was greater than forsaking one’s kin.
Though isolated, the Norden could not avoid contact with outsiders. Southern traders brought rare goods—bronze, salt, and grain—but also disdain for the Norden’s "barbaric" ways. The Norden viewed outsiders with suspicion, a wariness that hardened into hostility when southern warbands sought to claim their lands. Such attempts were met with fierce resistance, for the Norden fought with the ferocity of wolves defending their den. Their warriors were legendary, wielding axes and spears with a fury born of necessity, and their seafaring prowess allowed them to raid distant shores when winters proved too lean.
The land itself shaped Norden culture, instilling in them a deep reverence for nature and the gods they believed dwelled in its wild places. They worshipped a pantheon of deities tied to the elements—Skathi, the goddess of winter; Njolfr, the storm-bringer; and Eira, the keeper of the hearth. Rituals and sagas preserved their history, recounting not only their struggles but the lessons learned from them.
Over centuries, the Norden became more than mere survivors—they thrived as explorers, traders, and storytellers. Yet their identity remained anchored to the unforgiving land of Norda, a region that both tested and defined them. To this day, the Norden are remembered as a people who forged strength from hardship and shaped their destiny with unyielding resolve.
The Levani
The Levani are a race of humans who originated within the Westcontre’s central and south-eastern lands of Levane. Where the divine sought stories of hearth and battle in the Norden, it sought power and glory in the Levani. Given manifest destiny upon a vast region marked by shifting dunes, fertile oases, and ancient trade routes crisscrossing the unforgiving desert, the early Levani found themselves living as nomadic caravans. Skilled in survival amidst the sands, they lived by the stars, guiding their herds of camels and goats from one oasis to the next, and traded incense, rare spices, and precious gemstones with distant lands.
Levani range in height from five to six and a half feet on average. Their skin is typically cream to darker shades of tan or beige, usually darkening heavily in the sun. Facial hair is common among men, with both men and women having coarse or wavy brown or black and occasionally straw-colored hair. Natural selection has led to their trending a leaner build.
The origins of their unity lay in the myth of Zahir the Unifier, a charismatic leader and tactician who is said to have descended from the desert gods. Zahir understood the futility of constant inter-clan feuds and the untapped potential of the scattered Levani people. Through shrewd diplomacy and decisive victories, he forged an alliance of clans, founding the city of Qarat-Zahir on the banks of the River Huran, one of Levane’s few permanent waterways.
Qarat-Zahir became a beacon of civilization in the desert, boasting irrigation systems that turned barren sands into fields of grain, dates, and olives. The Levani became adept at harnessing the waters of the Huran, digging qanats (underground channels) to expand their agricultural reach. This surplus of food allowed the Levani to grow beyond subsistence, leading to flourishing trade with neighboring regions.
Bronze tools and weapons marked a turning point for the Levani. Their artisans, inspired by the geometric patterns of the dunes and stars, created intricate designs in bronze and gold, setting their wares apart in the bustling markets of Qarat-Zahir. Meanwhile, the Levani army—armed with bronze swords, reinforced chariots, and a deep understanding of desert warfare—secured the empire’s borders and expanded its influence.
At its height, the Levani Empire stretched from the jagged cliffs of the Khalan Coast in the west to the emerald highlands of Tarqim in the east. Its cities, adorned with domes and spires that glimmered in the sun, were centers of art, science, and learning. Levani astronomers charted the heavens, while their poets composed epics that celebrated the gods, the desert, and the empire’s enduring strength.
However, the Levani’s rise was not without hardship. Periodic droughts tested their resourcefulness, and rebellions flared in the more distant provinces. Their resilience and ability to adapt—hallmarks of their nomadic ancestry—allowed them to weather these storms.
The Abessy
Power and honor, war and conquest, the divine had achieved much with two varieties of Man, and yet it did not yet satisfy. Emerging forth from the desire for worship, of palatial reverence and animistic folklore, there came the Abessy, peoples dark of skin and bright of eyes from the Westcontre’s unknown southern regions. Abessy range in height from four and a half to five and a half feet on average. Their skin is typically dark brown to heavier shades of brown or black, showing little effect by exposure to the sun. Facial hair is common among men, with both men and women having coarse or nappy black and occasionally brown or straw-colored hair. Natural selection has led to their trending a heavier, stronger build. The Abessy arose first amongst the verdant highlands of Abessia, a land cradled by rugged mountains, deep valleys and rivers that snake through fertile plains. In their earliest days, the Abessy were hunter-gatherers, roaming the forests and savannas of Abessia, surviving on the bounty of wild game, roots, and fruit. They revered the natural world, believing the mountains to be the thrones of gods and the rivers to carry divine blessings.
Change came with the discovery of grains and agriculture that flourished in the highland soils. Likely procured through cultural exchange with the Levani, this cultivation allowed the Abessy to settle, giving rise to villages and a burgeoning agrarian society. With stability came growth, and the Abessy developed intricate irrigation systems to tame the rivers and expand their farmlands. The abundance of food attracted traders from neighboring regions, bringing with them goods, ideas, and technologies.
The turning point in Abessy history came with the emergence of the Oracles of Abdar, a priestly caste that claimed communion with the divine. They interpreted the will of the gods through celestial signs and the rhythms of the earth, guiding the Abessy in matters of governance, warfare, and agriculture. The Oracles declared Abdar, a sun god of justice and prosperity, the supreme deity, and established his worship at the heart of their society.
Under the Oracles’ leadership, the Abessy transitioned from a loose confederation of villages into a unified theocratic state. They constructed monumental temples and obelisks in honor of Abdar, using advanced stoneworking techniques that drew admiration from neighboring peoples. These structures became not only centers of worship but symbols of the Abessy’s divine mandate and burgeoning power.
As their influence grew, the Abessy expanded their territory, assimilating or subjugating nearby tribes. Trade routes thrived under their control, bringing ivory, gold, and incense into their markets and establishing Azura as a hub of commerce. Their scribes developed a written script to record religious texts, trade transactions, and the laws decreed by the Oracles, solidifying their authority.
The Baejki
The Baejki people emerged on the mist-shrouded islands of Baejk, a land of rolling hills, dense forests, and rivers cascading into an indigo sea. In their earliest days, the Baejki lived as agrarian clans, cultivating rice in terraced paddies carved into the hillsides and fishing the abundant coastal waters. Their villages were scattered yet connected by a shared reverence for the spirits of the land, sea, and sky, whom they believed guided their fates. Baejki range in height from four to five and a half feet on average. Their skin is typically cream to darker shades of beige, usually reddening in the sun. Facial hair is common, yet thin among men, with both men and women having silken, straight brown or black and occasionally straw-colored hair. Natural selection has led to their trending a lithe and muscular build.
The foundation of their rise was laid with the development of sophisticated irrigation systems, enabling the cultivation of rice and millet on a scale that sustained growing populations. Roads, initially footpaths through dense forests, were widened and paved with stone, linking villages to regional centers. The Baejki crafted bridges of wood and rope, daring the rushing rivers and steep gorges of their homeland. With these advancements, trade flourished, and their markets teemed with ceramics, silk, and metal goods.
The sea, however, was their true lifeblood. The Baejki became master shipbuilders, crafting swift, seaworthy vessels that could navigate both the coastline and the deeper waters of the Shimmering Sea. These ships carried merchants far afield, exchanging jade, spices, and textiles with distant lands. Maritime trade fueled the prosperity of emerging city-states, and the harbors of Baejk became bustling hubs of commerce and culture.
The unification of the Baejki clans into the Baejki Empire was spearheaded by the visionary leader Yon Myol, a chieftain-turned-conqueror. Yon Myol united the main island through a combination of military prowess and diplomacy, proclaiming himself the first Emperor of the Baejki. He established Gyon’do, a fortified city at the mouth of the Serene River, as his capital. Gyon’do became a beacon of learning, art, and governance, its towering palaces adorned with intricately carved wooden eaves and colorful tiles.
Under the Baejki Empire, a codified system of laws was implemented, infrastructure expanded, and naval power solidified. Their navy safeguarded the sea routes, ensuring the uninterrupted flow of goods and ideas. The Baejki also developed a unique written script, preserving their literature, history, and state decrees for posterity.
By the height of their influence, the Baejki were both architects of an enduring empire and navigators of the vast oceans, weaving together the threads of trade, culture, and governance. Their legacy remains one of resilience, ingenuity, and a profound connection to both land and sea.
|
|
|
|
 Sangreal Terms of Service
 |
|
Posted by: __denby - 08-19-2024, 10:42 PM - Forum: Info and Rules
- No Replies
|
|
Sangreal General Legal Disclaimer and Terms of Service v.1.0
Participation on the Sangreal forums, server and otherwise accompanying entities, is an automatic acceptance of the Terms of Service and Legal Disclaimer. Written, recorded, and otherwise created content posted upon the forums, server and otherwise accompanying entities is considered void of all exclusive rights granted to creators under 17 U.S. Code § 106. All content on Sangreal is considered to be “Fair Use” under the United States Copyright Law, however, Sangreal reserves the right to remove access of this “Fair Use” material to any consumer, at will. The sharing of content on Sangreal removes all reservations that the individual may be claimant to. The author of content possesses the right to re-use material that they have published upon Sangreal, and may not be pursued by Sangreal for legal violations.
Sangreal has made every attempt to ensure the accuracy and reliability of the information and details provided on this website and forum. However, the information provided is “as-is” and is published by individuals not affiliating with any legal corporation or for-profit enterprise. This information is provided without a warranty of any kind, and Sangreal does not accept any responsibility or liability for the accuracy, content, completeness, legality, or reliability of the information contained on this website.
No warranties, promises, and/or representations of any kind, expressed or implied, are given as to the nature, standard, accuracy or otherwise of the information provided in this website, nor to the suitability or otherwise of the information pertaining to your particular circumstances. Sangreal will to the best of its’ ability supply potential legal claimants with the information required to pursue action against an individual on the website of Sangreal, but is not able to be held liable for any actions that said individual has taken. Posting and/or making any commentary and contribution to the website and community of Sangreal, comes with the responsibility of the individual, that they are individually liable for all punishment and conflict that may arise due to their content. Sangreal therefore waives all liability.
Sangreal shall not be liable for any loss or damage of whatever nature (direct, indirect, consequential, or other) whether arising in contract, tort or otherwise, which may arise as a result of your use of (or inability to use) this website, or from your use of (or failure to use) the information on this site. This website provides links to other websites owned by third parties. The content of such third party sites is not within the control of Sangreal and Sangreal cannot and will not take responsibility for the information or content thereon. Links to such third party sites are not to be taken as an endorsement by Sangreal of the third party site, or any products promoted, offered or sold on the third party site, nor that such sites are free from computer viruses or anything else with relevant destructive properties. Sangreal cannot and will not take responsibility for the collection of, or use of, personal data from any third party site. In addition, Sangreal will not accept responsibility for the accuracy of third party advertisements.
Acceptance of the Sangreal Code of Conduct, Rules of Roleplay, Terms of Service, ad infinitum is therefore reliant on the individual. Sangreal reserves the right to remove all services at will, from the consumer, should the consumer violate the aforementioned documents.
Sangreal is a Public Not-For-Profit Non-Corporate Entity unregistered in the United States of America. In order to officially contact Sangreal, please send all correspondence to ‘kristoffmerkas@gmail.com’.
|
|
|
|
|
|
| Latest Threads |
crypto trading bot for be...
Last Post: Josephmog
07-12-2026, 01:21 PM
|
fast indexing python
Last Post: Josephmog
07-11-2026, 05:51 PM
|
how to index website goog...
Last Post: Josephmog
07-09-2026, 01:38 AM
|
fast indexing dataframe
Last Post: Josephmog
07-06-2026, 06:44 PM
|
U4GM Delta Force Items: W...
Last Post: yourangel
07-01-2026, 07:56 AM
|
DeFi Development Solution...
Last Post: yourangel
07-01-2026, 07:52 AM
|
MMOexp-Skull and Bones: D...
Last Post: Chunzliu
07-01-2026, 03:54 AM
|
MMOexp-COD BO7: MP175 Nuk...
Last Post: Chunzliu
07-01-2026, 03:53 AM
|
MMOexp-Madden 26: The 3 B...
Last Post: Chunzliu
07-01-2026, 03:51 AM
|
RSorder-OSRS: 400 Dry? Me...
Last Post: Chunzliu
07-01-2026, 03:50 AM
|
|
![[Image: AD_4nXdUfdXAfHBfxehSKz6lrs4bAAhTFRjj1rgQ...v5Wtznhabg]](https://lh7-rt.googleusercontent.com/docsz/AD_4nXdUfdXAfHBfxehSKz6lrs4bAAhTFRjj1rgQOlVmUxNzflJNvcpndtR_q9vloaM_pcEcdS-mLMcIUePRQa-f3kbqXw1moTKJTqhdiBbcFgspjG5AVYzhfTUiAdu0aXcvgGMXPNAI?key=TkSBtgn38ew_v5Wtznhabg)
![[Image: AD_4nXd6p3KSlRVZCO7kj6FJx1TAjR1agZtpgzZR...v5Wtznhabg]](https://lh7-rt.googleusercontent.com/docsz/AD_4nXd6p3KSlRVZCO7kj6FJx1TAjR1agZtpgzZR-Q3gnZGXXf4ZLYOW26K8wNnmLn1lLRyqCHVvEZC8GEcUBofcQcSY7FW9y9rG7-ruCoZ7MlT4pTGLnf0OLkQ1n5AmiEF11QsKajmYNx-_xBc0eS1h_BlhIFE?key=TkSBtgn38ew_v5Wtznhabg)
![[Image: server_map.jpg]](http://193.122.143.38/images/revolution/server_map.jpg)